Deploying a Spine Leaf VXLAN DCN using AFC
In this article, I will use AFC to deploy a spine leaf topology using VXLAN. For reference, the following topology will be used throughout this example.
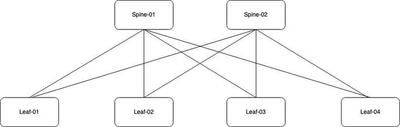
The network is comprised of two spine switches and four leaf switches. Each pair of leaf switches has been deployed using VSX as shown in the previous article. Now I will use AFC to deploy VXLAN.
Normally this would take a massive amount of effort. It can require a considerable amount of hours to generate the necessary config and perform the validation. Using AFC, you can have a complex topology deployed very quickly. Let’s look at an example.
Underlay Configuration
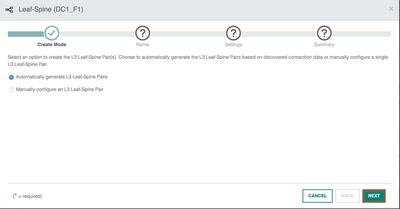
The first step is to implement the underlay configuration. To begin, select the Spine Leaf option from the wizard. From there, you can choose to automatically detect the devices or you can manually specify them. I will select automatic detection and proceed.
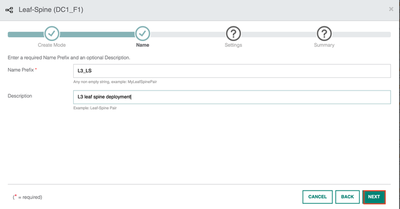
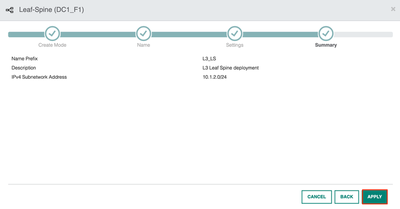
Provide a relevant name and description for the task.
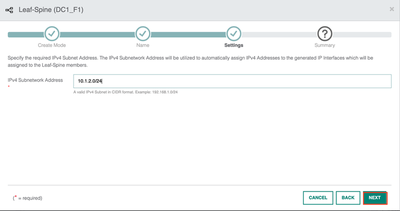
I will provide a subnet range for the underlay. The IP addresses will be assigned to the uplink interfaces between the spine and leaf switches.
Review the summary and hit apply to configure the uplink interfaces.
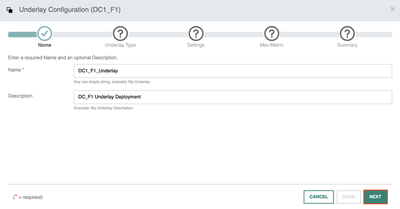
Now go back to the wizard and select the underlays option.

Provide a name and description then move onto the next phase.
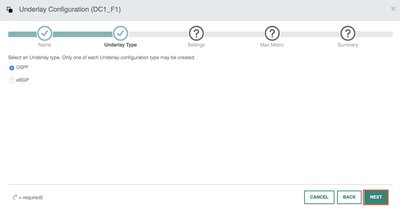
I will choose which routing protocol I wish to use for the underlay. eBGP is often considered for larger deployments where multi ASNs are required between the leaf and spine switches. For this example, I will choose OSPF for simplicity.
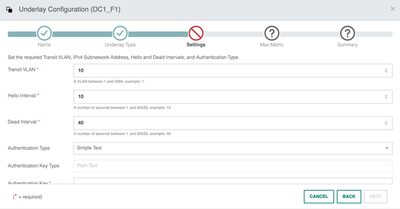
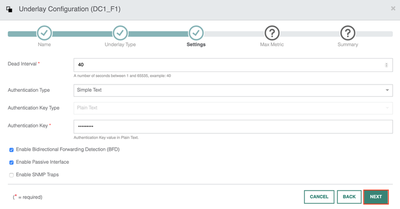
I will keep the default OSPF timers but I will enable BFD to help detect a failure. An authentication key will be used and I have assigned VLAN 10 for the transit VLAN.
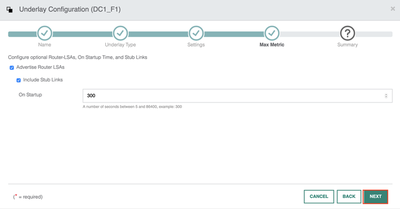
Next, I will use the default advertisement options.
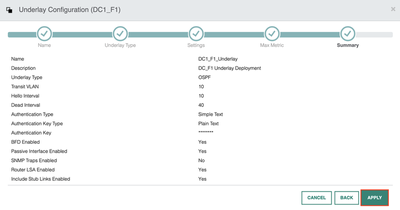
Review the configuration one last time to ensure everything is correct and hit apply to deploy the config.
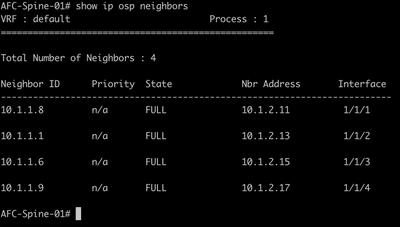
If we take a look at some of the devices, I can see the OSPF config has been applied.
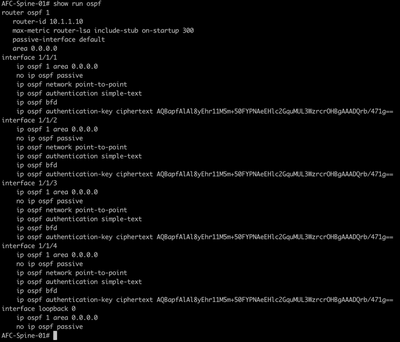
OSPF adjacencies have been formed between the switches. Everything is looking good so far.
Now lets move into the overlay configuration section.
Overlay Configuration
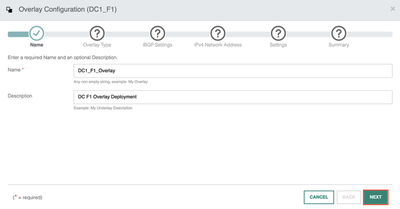
Select the overlay option from the wizard to begin the overlay deployment. Next, give the task a name and description.
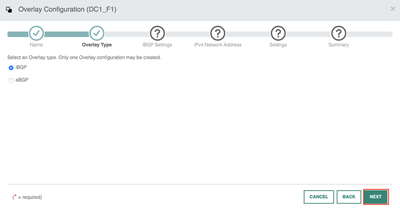
I now have the option to choose iBGP or eBGP for the overlay. In this example I will use iBGP.
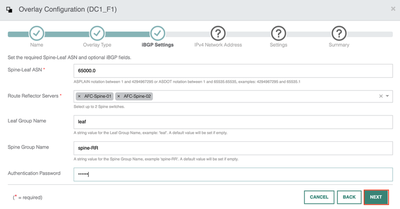
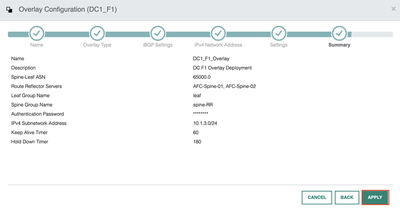
To support the iBGP deployment, I specify the ASN and configure both spine switches as route reflectors. I then create BGP groups for the leaf and spines. An authentication password is applied.
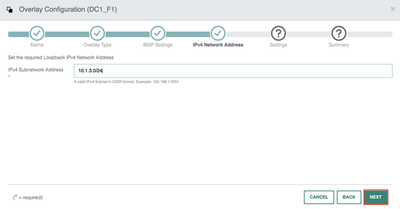
An IP subnet is required for the overlay loopbacks. I will use the subnet 10.1.3.0/24 for the interfaces.
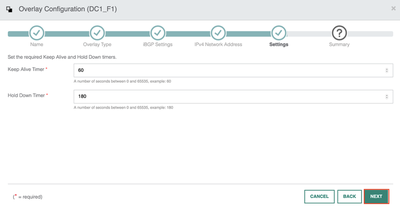
I then keep the default timers and hit next.
Review the configuration and then deploy the config using the apply button.
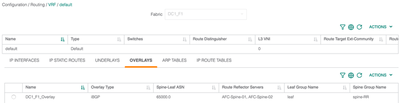
If you go into Configuration > Routing > VRF > Default, you can see the overlay has been deployed in the GUI.
Moving back over to the CLI, the BGP config has been deployed to each device.
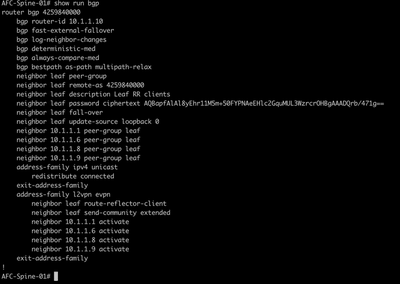
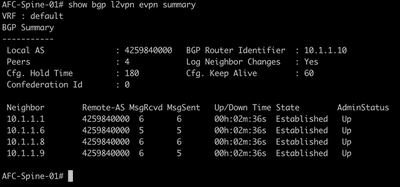
BGP adjacencies have been established.
Lets proceed with the EVPN config.
EVPN Configuration
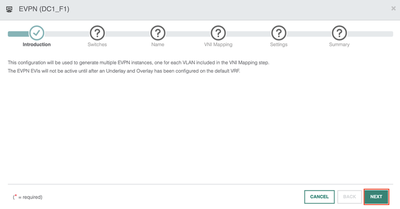
I will deploy a single VLAN using EVPN. Choose the EVPN option from the wizard.
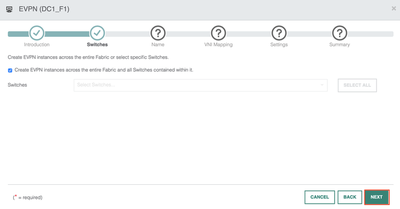
I will now deploy the EVPN configuration to all switches in the fabric.
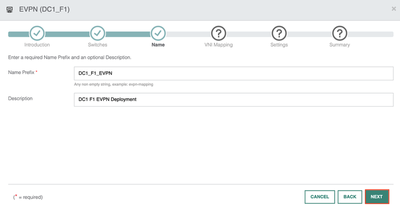
Provide a name and description for the task.
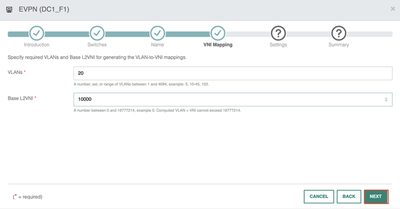
At this point, you can deploy a range of VLANs using EVPN. As mentioned, I will be deploying a single VLAN for this scenario. I will use VLAN 20 with a base L2VNI of 10000.
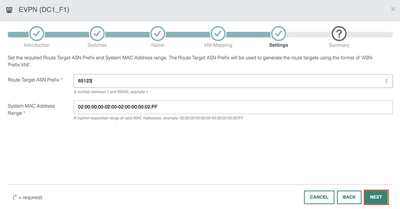
Specify the route target and system MAC address.
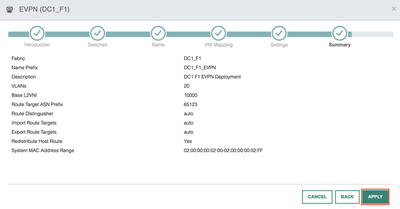
Finally, verify your EVPN configuration before deploying the config.
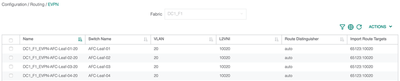
To verify the EVPN config, go to Configuration > Routing > EVPN as below.
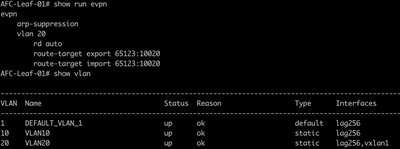
The EVPN configuration is also available using the CLI.
That’s it for now! You can use this as a base and then start building out additional configurations for your environment.
Summary
During this post, I have covered the following;
- Deploying the underlay using OSPF.
- Deploying the overlay using iBGP.
- Configuring EVPN and VNI mapping information.
- Verifying each stage of the deployment.